Manual for Profile Settings
This handbook is intended for all users, including researchers, PURE editors, and editors from the teaching hospitals of PMU.
It provides guidance on accessing PURE and managing profile settings.
1. Login
1. Login Options
Users with an @pmu.ac.at email address can log in to PURE directly via https://my.pmu.ac.at/ by clicking on the PURE icon.
Users with an @salk.at or @klinikum-nuernberg.de email addresses can log in via the following link: https://pure.pmu.ac.at/admin/login.xhtml.
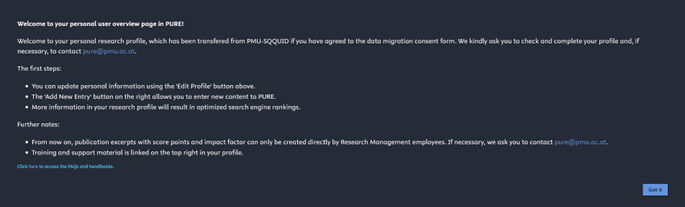
After the first successful login, you will see this message:
Popup blockers can block editor windows of Pure; therefore, it is recommended to (temporarily) disable your popup blocker.
If you cannot log in, please contact Research Management at pure@pmu.ac.at for assistance.
2. Manage your profile
Important for PURE-editors
Please do not change any notification settings for emails, notifications, and tasks connected to the workflows (in the Editorial tasks category) of research outputs, awards, and persons.
2.1. E-Mail Settings
Pure email notifications will be sent to the email address you used to log in. For example, as a researcher, you got an email when a new publication is added to your profile.
Here is an example of an email:

To manage the email settings:
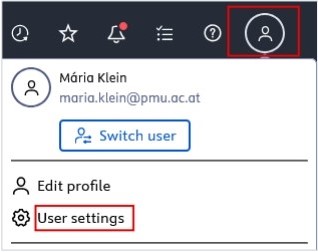
1. Click on Profile menu in the header and select User settings:

3. Select the desired frequency.
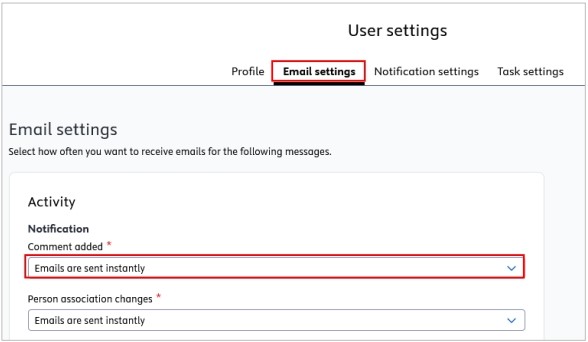
4. Click Save to apply the changes.
2.2. Notification Settings
Similar to the email settings, you can manage the notifications that Pure automatically sends you when specific events occur.
Here is an example of a notification:

To manage the notification settings:
1. Click on Profile menu in the header and select User settings:
3. Select the desired frequency.
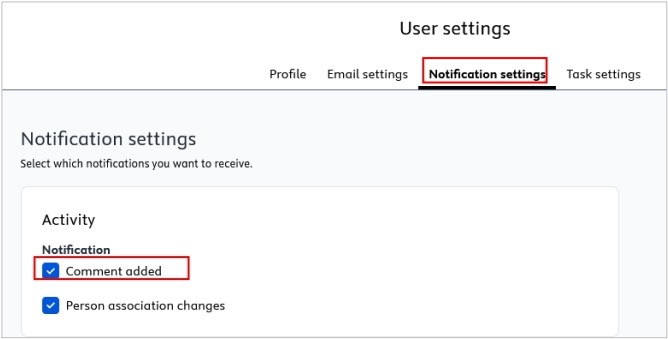
4. Click Save to apply the changes.
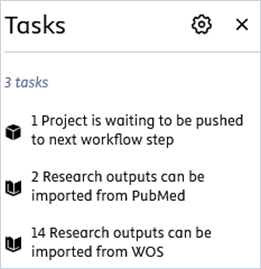
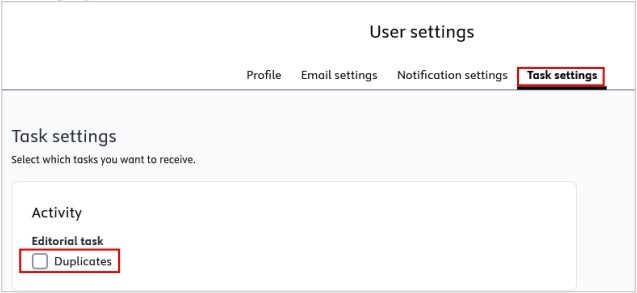
2.3. Task Settings
You can manage the notifications that Pure automatically sends you when a specific task occurs.
Here is an example of a task notification:
To manage the task settings:
1. Click on Profile menu in the header and select User settings:
3. Select the desired frequency.
4. Click Save to apply the changes.
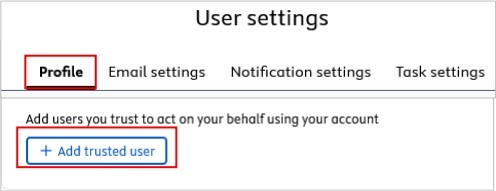
2.4. Trusted Users
Trusted users have full access to the profile of the user who added them as a trusted user. A trusted user has the ability to assume control of your user account and perform all the tasks that you can within PURE, except for controlling other accounts with a trusted user status.
To add a trusted user:
- Click on Profile menu in the header and select User settings:

- Select Profile and navigate to Trusted Users. Then click on the Add trusted user button. Begin searching for the name of the trusted user you wish to add. You can add multiple trusted users.

- Click on Save.

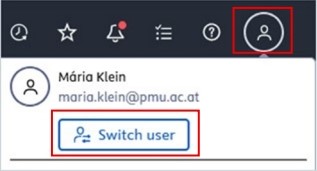
Even if you add trusted user(s), you can still monitor any changes they make. These alterations are recorded in the Comments and History panel.
A trusted user can switch between their own profile and the profile of the user who added them as a trusted user by clicking on the Switch user button:
To remove a trusted user, click the x next to the trusted user's name.
2.5. Language Settings
The language controls the language of the menu. The submission language controls the language of the data that will enter into Pure. It is your choice that the menu language and the submission language can be the same or different.
To change the language:
1. Click on Profile menu in the header and select User settings:

2. In the Profile tab select the language in the Language and or in the Default submission language field. German and English language options are made available by PMU:
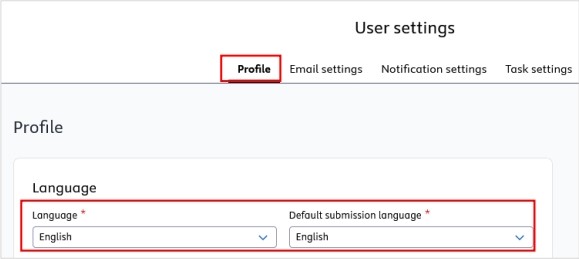
3. Click on Save to apply the changes.
If you frequently enter content in both English and German, you can easily switch between the current submission languages by clicking on the flag ![]() corresponding to your preferred language.
corresponding to your preferred language.
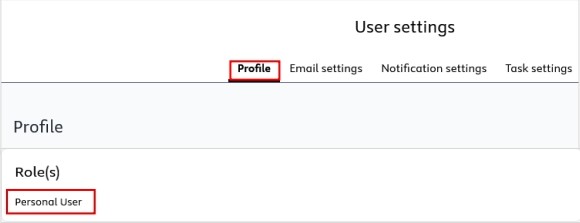
2.6. Roles
The researchers at PMU have been assigned a personal user role. The PURE-editors of organisational units of PMU receive additional roles. Please contact the Research Management (pure@pmu.ac.at) if you encounter a problem with your role.
To check on your role(s):
- Click on Profile menu in the header and select User settings:
2. In the Profile tab under Roles, you can see all your roles:
2.7. Personal profile
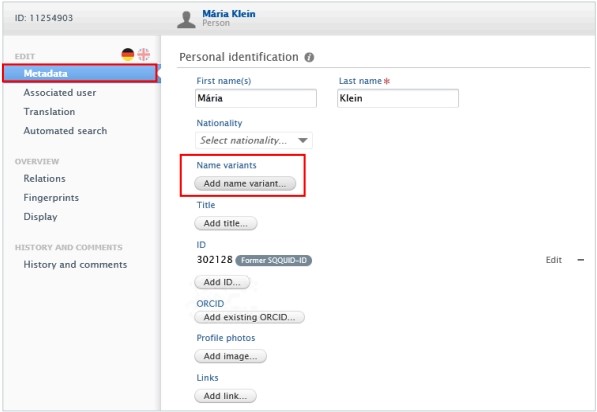
Under the Personal tab, you can manage a wide range of information associated with your researcher profile. For example, you can add name variants, profile photo, ORCID, research description, and positions held outside of the PMU. You are responsible for all the information included in your personal profile. We recommend providing as much information as possible in your Personal profile.
Here is an example how to manage your name variants, for example, names before marriage or multiple middle names. This field also serves to improve accuracy in automated publication search.
To manage your name variants:
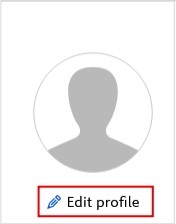
- Click Personal in the header and go on Edit profile (located under the picture):


- Click on the Metadata tab in the left navigation.
- In the Personal Identification tab click on the Add name variants button to expand the Name variant area:

-
Enter the First Name and the Last Name you want to add, then click on Create.
Click on the minus icon to remove the names. Click on Edit to update the names.
- Click on Save.

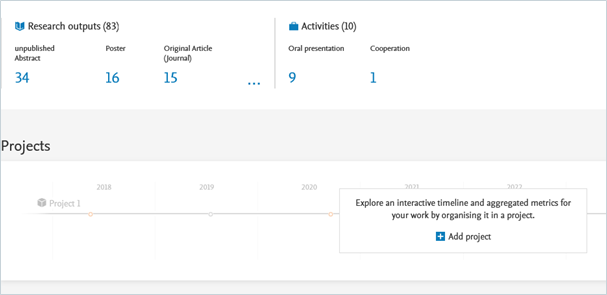
Your scientific work in numbers and graphs
Under your personal profile, your scientific work is visualized through numbers and graphs, including your research outputs, projects, research network, top co-authorships, and top organizational affiliations on research outputs.